This document provides instructions for installing Protein Prospector manually on a Windows server. Protein Prospector will probably work on most versions of Windows back to Windows XP but we recommend Windows 7 or Windows 10. Also the Firefox web browser is recommended. There are quite a few packages and files that you will need to download. These can be downloaded from our download server but first you need to email us for a link. Protein Prospector is available free for Universities and Non-Profits. There are 3 levels of installation. First there is the Basic version that has the basic database search programs such as MS-Fit, MS-Tag, etc and the peptide/protein MS Utility programs like MS-Digest and MS-Product, etc. The Full version adds the Batch MSMS Database Searching capability with associated programs. The Raw Data Package allows you to do quantitation and single spectrum display by accessing Thermo .raw files. You can do the installation incrementally adding capabilities as you progress. There used to be an automated installer but the packages it used are now out of date.
It is also possible to run the Protein Prospector programs from the command line. Eg as part of another pipeline or on a cluster. Those facilities are not described here.
A list of the potential downloads is given below.
- BASIC version
- Prospector BASIC distribution: prospector..basic.zip - if you only ever want the BASIC version
- FULL version
- Prospector FULL distribution: prospector..fullmpi.zip
- BASIC and FULL version
- Visual C++ Redistributable Visual Studio 2015-2022: VC_redist.x64.exe
- Apache Web Server: httpd-2.4.54-win64-VS16.zip
- Indexed SwissProt FASTA database: seqdb.2022.05.26.zip
- Taxonomy Files: taxonomy.2022.05.26.zip
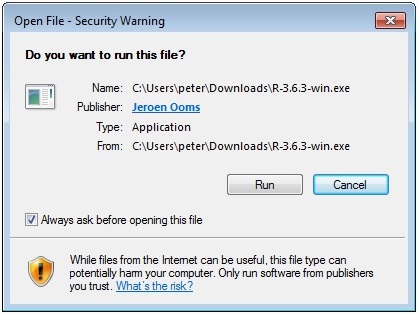
- R statistics package: R-3.6.3-win.exe
- Perl: strawberry-perl-5.32.1.1-64bit.msi
- Example file to test Perl: msms2.txt
- FULL version
- mySQL: mysql-5.7.38-winx64.zip
- Batch-Tag mySQL database initialization script: prospector.sql
- Batch-Tag test peak list: F1.mgf
- MPICH: mpich2-1.4.1p1-win-x86-64.msi
- Raw Daemon package
- Raw Data Daemon package: rd_new.zip
- Data set to test the Raw Daemon: T20100722-33_ITMSms2cid.zip
First download the Protein Prospector zip file. If you only ever intend to install the BASIC version then download the file prospector..basic.zip. If you intend to eventually install the FULL version then download the file prospector..fullmpi.zip.
The next step is to decide where you want to install Protein Prospector. If you are just installing the BASIC version then the system (C) drive may be OK. Generally however it is probably best to install the package on an additional hard drive. Protein Prospector makes use of some directory structures that can get very large. These can easily be relocated. The main directory structures are:
- BASIC and FULL version
- Protein sequence databases (optional but almost always used)
- MS-Viewer repository (optional)
- FULL version
- User repository (necessary)
- Laboratory data repository (optional)
Login using an account with administrative privileges.
If you want to search UniProtKB databases then these are very large and you need to create a 64 GB byte page file.
Ensure that the account has the right to install and run services. Open the Control Panel and go to Administrative Tools (this may be called Windows Tools). Open Local Security Policy, then open Local Policies and select User Rights Assignments. Then open Log on as a service. Click Add User or Group and add the user name you are currently using. Then click OK.
If we assume you want to install the package in the directory D:\Prospector first create the directory D:\Prospector.
Open the zip file you downloaded, say prospector..fullmpi.zip.
Go into the directory prospector. in the zip file.
Copy the web directory to D:\Prospector.
You should now have a directory D:\Prospector\web.
Create a directory D:\Prospector\seqdb
Open the seqdb zip file say seqdb.2022.05.26.zip
Go into the directory say seqdb.2022.05.26 in the zip file.
Copy the files in the directory to D:\Prospector\seqdb
Open the taxonomy zip file say taxonomy.2022.05.26.zip.
Go into the directory taxonomy.2022.05.26 in the zip file.
Copy the files into the directory D:\Prospector\web\params\taxonomy.
Edit the file D:\Prospector\web\params\info.txt with Notepad
Near the top of the file (section 1) change the line:
seqdb C:\Program Files (x86)\UCSF\Prospector\seqdb
to
seqdb D:\Prospector\seqdb
Apache is available from this web site. The latest currently tested version is 2.4.54 (Jun 2022). You can download either the 32 or 64 bit version. These instructions will just install a http server as localhost.
Before installing Apache you need to ensure Visual C++ Redistributable Visual Studio 2015-2022 is installed. This can also be downloaded from the same web site in 32-bit and 64-bit variants.
Unzip the Apache24 folder in the zip file to C:/Apache24
It's a good idea to make a backup of the file httpd.conf from the folder C:\Apache24\conf
Edit the file C:\Apache24\conf\httpd.conf
Add the following lines at the end of the file. Note that this assumes your Prospector\web folder is on drive D. If not then adjust accordingly.
# Begin: Prospector Installer

Alias "/prospector/" "D:/Prospector/web/"
Alias "/prospector" "D:/Prospector/web/"
<Directory "D:/Prospector/web">
    Options Indexes FollowSymLinks
    AllowOverride None
    Require all granted
</Directory>

<Directory "D:/Prospector/web/cgi-bin/" >
    SetHandler cgi-script
    Options ExecCGI
    Require all granted
</Directory>

<DirectoryMatch "D:/Prospector/web/cgi-bin/">
    SetHandler cgi-script
    Options ExecCGI
    Require all granted
</DirectoryMatch>

# End: Prospector Installer
In the file there's a section saying:
#
# ServerName gives the name and port that the server uses to identify itself.
# This can often be determined automatically, but we recommend you specify
# it explicitly to prevent problems during startup.
#
# If your host doesn't have a registered DNS name, enter its IP address here.
#
#ServerName www.example.com:80
Immediately after this add the following line:
ServerName localhost
Two other things that you might want to adjust either now or at some point in the future are the Apache timeout and the maximum upload file size. These are specified via the TimeOut and LimitRequestBody specifiers. TimeOut is specified in seconds (default 60) and LimitRequestBody in bytes (default 1073741824). They can be specified at the end of the httpd.conf file. You need to restart Apache for them to come into effect. If you want bypass these checks you would add these lines.
TimeOut 0
LimitRequestBody 0
You might need a large (or unbounded) limit for the file size if you want to use Batch-Tag Web for large peak lists or with raw data files. Also if you want to move Batch-Tag projects between servers using the Results Management program. MS-Viewer also sometimes needs to upload very large files such as MaxQuant results sets.
If you are interacting with the server and it is giving you feedback on the progress of a search then the timeout is reset every time it prints a message. However there are cases when the default value is insufficient.
After saving the httpd.conf file open an Administrator Command Prompt (right click the Command Prompt menu option and select Run as Administrator).
Run the following commands:
C:
cd C:\Apache24\bin
httpd.exe
Check and address any error messages.
With httpd.exe running check if the Prospector home page can be displayed in a browser. The web address should be:
http://localhost/prospector/mshome.htm
If this works then go to the Command Prompt and quit the httpd.exe process with Ctrl-C or with the Task Manager.
Install the Apache service using the following command in the Administrator Command Prompt.
httpd.exe -k install
Go to the services panel and start the service.
Also make sure that the service starts automatically by right clicking Properties and setting Startup type as Automatic.
From the Protein Prospector home page select MS-Isotope and check that it works.
If MS-Isotope doesn't work and you have Windows 11 (maybe also Windows 10) it may not be able to find msvcr120.dll and msvcp120.dll. One work around for this is to go to %WinDir%\SysWow64 make copies of msvcp120_clr0400.dll msvcr120_clr0400.dll and respectively rename them to msvcr120.dll and msvcp120.dll.
You can check the sequence database and taxonomy installation by running MS-Fit. If OK you should have a SwissProt database option.
Select the SwissProt data and select SACCHAROMYCES CEREVISIAE as the Taxonomy.
On the results page open up Pre-Search Results.
It should say something like:
Taxonomy search SACCHAROMYCES CEREVISIAE selects 7907 entries.
If you want to directly connect to Protein Prospector when connecting to the server then copy D:\Prospector\web\index.html to C:\Apache24\htdocs overwriting the index.html file that is there. Protein Prospector should now open as:
http://localhost
or via the domain name of your server.
The R scripts currently used are:
This script is used to produce the mass error plot in MS-Product.
This script is to produce the histogram in a DB-Stat report.
This script is to produce the plot of quantitation ratios for each protein in a Search Compare peptide report.
This script is to produce the survival plot in an MS-Tag report if the expectation calc method is set to linear tail fit.
This script is to produce the plots in a Search Compare false positive rate report.
These scripts are used by the other R scripts.
If R is not installed these graphs won't appear. But other than that the package will still work.
R is available from this web site. We currently suggest installing 3.6.3 (Feb 2020). Newer versions have been found to have problems with the expectationDensity.R script. Older versions should also be OK (eg 2.14.1 from Dec 2011 is OK) and will take up less disk space.
The wizard sequence is shown below:


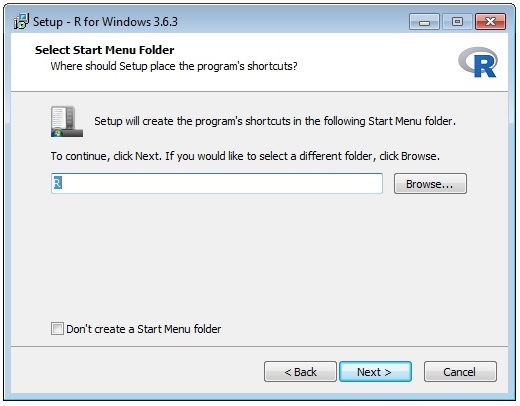
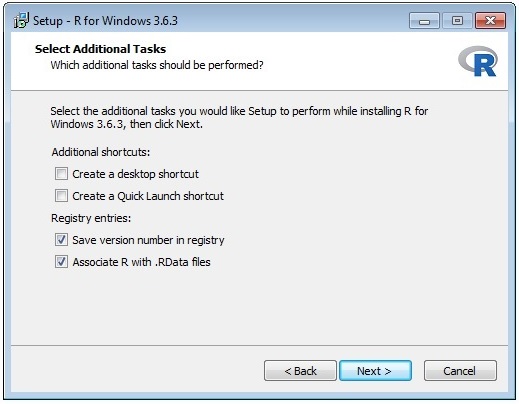
Once you have installed R you need to edit the entry in the file D:\Prospector\web\params\info.txt with Notepad.
E.g. in section 5 change the line:
r_command C:\Program Files\R\R-2.14.1\bin\R
to
r_command C:\Program Files\R\R-3.6.3\bin\R
To test R run the default MS-Tag page.
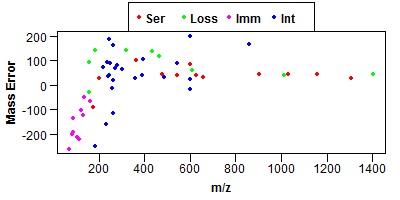
Click on one of the peptides in the results and it should bring up an MS-Product page. If it is working the MS-Product page should show a mass error graph like the one shown below.
The Perl scripts currently used are:
These scripts are used by MS-Viewer to convert results files from other proteomics software. Perl is only necessary if you need this functionality.
Perl is available from this web site. We currently suggest installing 5.32.1.1 (Jan 2021), msi installer, 64-bit. Previously we have also successfully used ActivePerl (eg. version 5.14.2, build 1402, 32 bit). However this is no longer available as an msi installer and registration is necessary.
The wizard sequence is shown below:

To test Perl bring up the MS-Viewer home page.
Set Results File Format to MaxQuant
Under the Results File option there's a Browse button. Select the example msms2.txt file
Press Upload New Results.
You should get a 3 line MaxQuant report. There will be no links as there is no peak list file. However it will test Perl is working.
If Perl isn't working you may need to "unblock" the Perl scripts. Find the Perl scripts in Prospector\web\cgi-bin and for each one right click the file and select the properties window. Then check the Unblock box. This feature is only found in recent versions of Windows.
You have now completed the installation of the BASIC version.
We currently use MySQL v5.7.38 (April 26th 2022). MySQL is available from this web site. The archive download is the Windows (x64, 64-bit), ZIP Archive mysql-5.7.38-winx64.zip. If the archive has been updated it should be possible to find it somewhere on the internet.
Ensure you are logged in as a user with administrative privileges.
Choose an installation location. If you do not install MySQL at C:\mysql, you must specify the path to the install directory in an option file.
Extract the contents of the mysql-5.7.38-winx64 folder in the downloaded archive to the chosen installation location. If you install the software at C:\mysql this should leave you with a C:\mysql\bin directory, etc.
Create an options file called my.ini in the installation directory used Notepad (it must be a plain text file). Make sure that you save it without the .txt suffix.
An example my.ini file is shown below. Note that this in this example the installation location is D:/mysql-5.7.38-winx64. If you have chosen different locations make substitutions for basedir and datadir. Note that datadir does not exist at present and will be created in a subsequent step.
[client]
port=3306
[mysqld]
port=3306
basedir="D:/mysql-5.7.38-winx64/"
datadir="D:/mysql-5.7.38-winx64/data/"
character-set-server=latin1
sql-mode="STRICT_TRANS_TABLES,NO_AUTO_CREATE_USER,NO_ENGINE_SUBSTITUTION"
max_connections=100
query_cache_size=0
tmp_table_size=35M
thread_cache_size=8
myisam_max_sort_file_size=100G
myisam_sort_buffer_size=69M
key_buffer_size=55M
read_buffer_size=64K
read_rnd_buffer_size=256K
sort_buffer_size=256K
innodb_flush_log_at_trx_commit=1
innodb_log_buffer_size=2M
innodb_buffer_pool_size=107M
innodb_log_file_size=54M
innodb_thread_concurrency=8
explicit_defaults_for_timestamp=true
The next step is to initialise the data directory for the first time. Open an Administrator Command Prompt and cd to the installation directory. Then run the following command.
bin\mysqld --initialize-insecure --console
This should create a data directory in the location specified in the location specified int my.ini file. If there are any errors you need to fix these and try again after first deleting the data directory you just created. Note that this creates the data directory with no root password. You can add this later if desired.
You should now test the server from the command line. Open up 2 Administrator Command Prompts and cd to the installation directory in both. The first is to start the server and the other to stop it. Start the server in one command prompt using the command:
bin\mysqld --console
You should get a number of messages ending with:
bin\mysqld: ready for connections. Version: '5.7.38' socket: '' port: 3306 MySQL Community Server (GPL)
Shut down the server from the other Command Prompt using the command:
bin\mysqladmin -u root shutdown
The MySQL server is then installed as a Windows service using the following command from an Administrator Command Prompt:
bin\mysqld --install
You should now be able to start and stop the service (called MySQL) from the Services panel.
With the server started next set a root password using the following command. This and all subsequent commands assume the root password is root.
bin\mysqladmin -u root password root
Next create the ppsd database from the sql script prospector.sql.
bin\mysql -u root -proot < prospector.sql
Now create the prospector user and it grant privileges to access the ppsd database. Also set the prospector user password to pp.
bin\mysql -u root -proot
At the mysql prompt enter the commands:
GRANT ALL ON ppsd.* TO prospector IDENTIFIED BY 'pp';
quit
You should now be able to log in as the prospector user and check the database is OK. Enter the following command:
bin\mysql -u prospector -ppp ppsd
At the mysql prompt enter the command:
show tables;
It should display the following:
+----------------+
| Tables_in_ppsd |
+----------------+
| aborted_jobs   |
| pp_users       |
| pp_version     |
| projects       |
| search_jobs    |
| sessions       |
+----------------+
6 rows in set (0.00 sec)
Then at the mysql prompt enter the command:
quit
Make sure the mySQL service is running by checking in the Services panel. You probably want to set the service so it automatically starts on reboot.
Select Search Table from the Protein Prospector home page. It should ask you to login at which point you can create a user. If that works then Prospector is talking to the mySQL database.
The next step is than to install the Batch Tag Daemon as a service. It can be set up to run Batch-Tag searches either single processor or multi processor. Multi processor operation needs MPI to be installed (see below).
Edit the file D:\Prospector\web\params\info.txt in Notepad
Change the line:
multi_process true
to
multi_process false
For this change in the file to take effect it must be done whilst the Batch-Tag Daemon is not started. The daemon either runs multi processor or single processor. To run multi-processor it needs MPI for which the installation instuctions are given in a section below.
The Batch-Tag daemon runs as a Windows service. It can be installed from a Command Prompt window run as administrator. Use the cd command to get to the Prospector\web\cgi-bin directory and then enter the following command:
btag_daemon.exe install user password
Here user and password are the user and password that the daemon will run under.
Note that if you are logging into a domain-joined machine and there is also a local account with the same name, the domain account will take precedence. To specify the local account you will need to specify the user as the computer name followed by the user (eg. Dell5550\user). The computer name can be found by right-clicking Computer, and then clicking Properties. The computer name appears under Computer name, domain, and workgroup settings. An alternative that works with most recent Windows versions is to use .\user instead. So in these cases example commands would be:
btag_daemon.exe install computer\user password
btag_daemon.exe install .\user password
If you want the daemon to start automatically when the computer is booted then you will need to edit the startup-type for the Batch-Tag Daemon service on the Services control panel once the service has been installed.
The daemon service can be uninstalled with the command:
btag_daemon.exe uninstall
After the Batch-Tag daemon is installed and has started you should now be able to initiate a Batch-Tag search assuming you have created a user in the mySQL database. Go to the Batch-Tag web form and test the search with the test peak list F1.mgf. You can use the default Batch-Tag parameters.
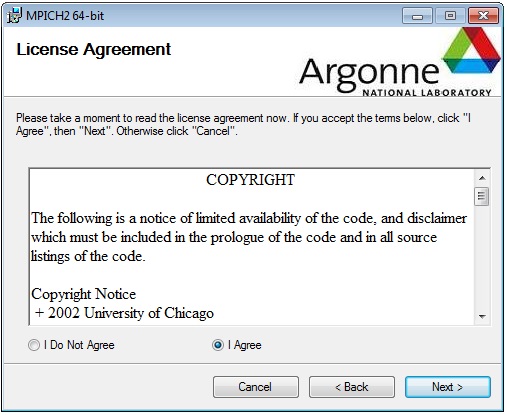
We currently use MPICH2 version 1.4.1p1 (Sep 2nd 2011). It is available from this web site. The MPICH2 releases have rc (release candidate) versions and p (patch) versions. This release is the last Windows version. The download is the Windows (64-bit), msi installer file mpich2-1.4.1p1-win-x86-64.msi.
MPICH2 needs .NET Framework v 2.0.50727. Go to Control Panel -> Programs and Features -> Turn Windows Features on or off -> check NET Framework 3.5 (includes .NET 2.0 and 3.0).
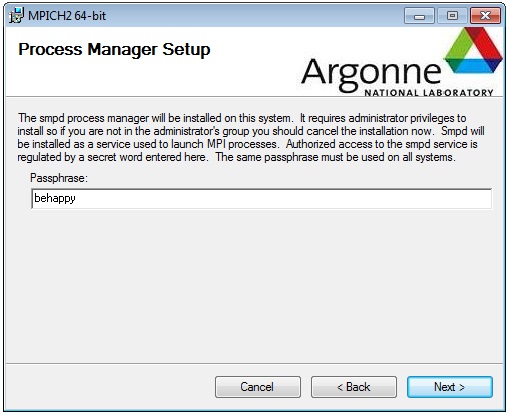
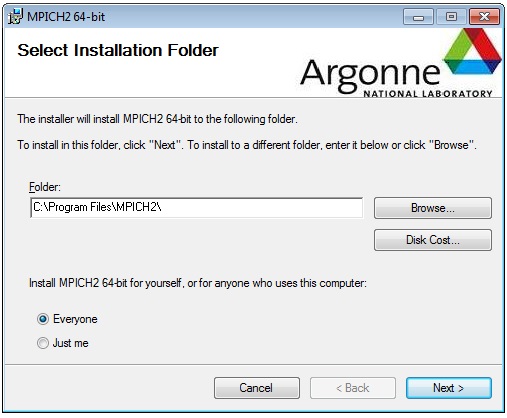
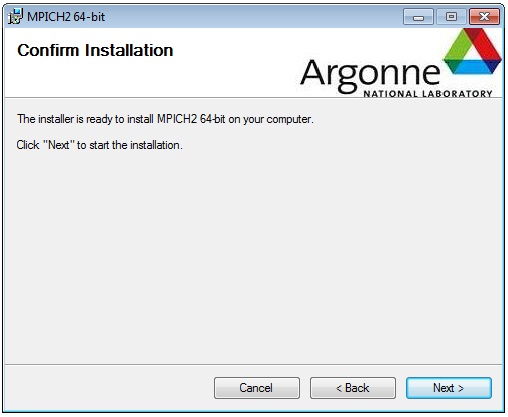
The wizard sequence is shown below:
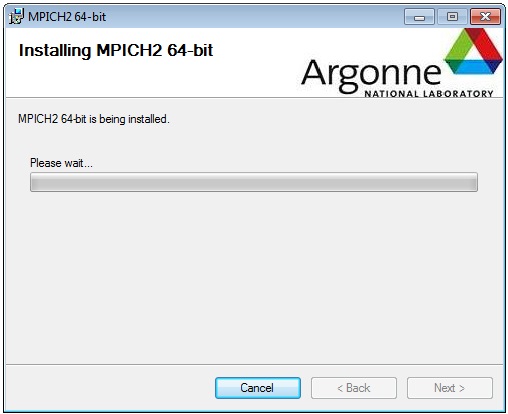
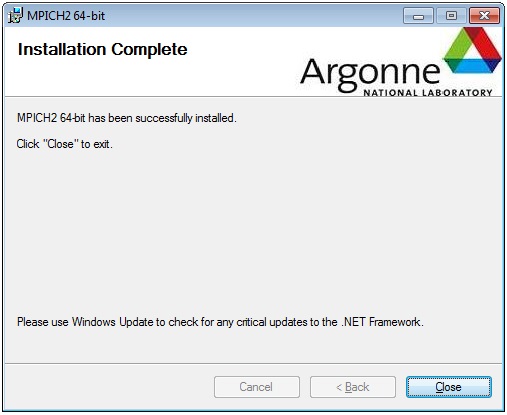
Open up an Administrator Command prompt and install the MPICH2 service with the commands:
cd C:\Program Files\MPICH2\bin
smpd.exe -install -phrase behappy
The phrase argument should match what you entered on screen 4 of the wizard.
Check that the service is running on the service panel.
Next you need to decide how many concurrent processes you want to run. For Windows this is specified in the info.txt file via the mpi_args directive. The default setting is:
mpi_args -n 3 -localroot
The number 3 specified here is one greater than the number of processors used (this is because there is a coordination process that doesn't do much). So this would use 2 processors and make the search roughly twice as fast.
If you are using MPI you also need to ensure that the multi_process directive in info.txt is set to true. If you need to change the multi_process setting this has to be done when no searches are running and the Batch-Tag Daemon service is stopped. After changing the multi_process setting and saving the info.txt file you can restart the Batch-Tag Daemon service. Note you can change the number of processors used without stopping the Batch-Tag Daemon service but there should be no Batch-Tag searches running when you do this.
If you have the Batch-Tag Daemon running you can test multiprocessor operation. Start up the task manager and get it to show processes from all users. Having initiated a Batch-Tag search check the task manager for mssearchmpi.cgi processes.
The Batch-Tag program can optionally make use of a laboratory data repository. This is a browsable area from which one or more MSMS peak list files can be selected to make a project which will be searched together as a batch. In this way it is possible to search multiple LC fractions in the same search. Also all the acquired data can be kept together in one place and only one copy of each file is required for all the users on the system. It is possible to set up a script that will automatically populate such a repository as the data is collected.
This is an alternative to using Batch-Tag Web where the data is uploaded and copied into the user's directory in the user repository. You may want to restrict this to cases such as searching data from another laboratory.
The base directories of the repository are specified in the Prospector\web\params\info.txt file via the centroid_dir and raw_dir directives. The use of a raw repository is only appropriate if you intend to install the Raw Data Package (see below). It is not necessary to have a raw data file for every centroid file and these can be added at a later date. The base directories would typically contain a directory for each physical instrument. Then there could be further subdirectories based on say years and months or users. An example is shown below. Here centroid_dir has been defined as peaklists and this contains four subdirectories called TOFTOF, QStarPulsar, QStarElite and Orbitrap. Each instrument then has further subdirectories based on the years and months in which the data was collected.
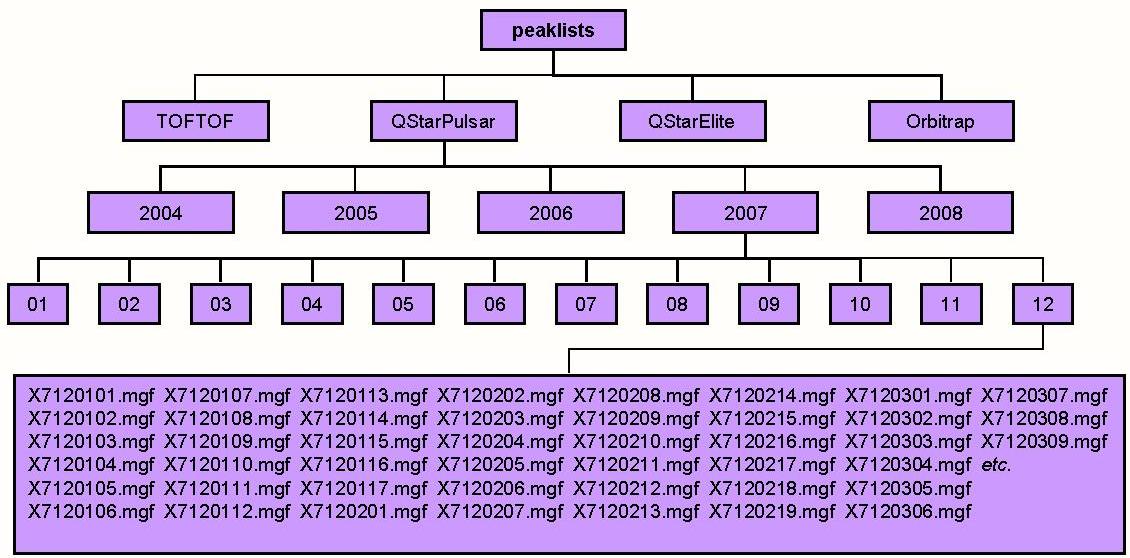
In the figure below raw_dir has been defined as raw. The directory names and raw data file names need to mirror the ones used in the peak list repository. Thus for example peaklists/QStarPulsar/2007/12/X7120107.mgf corresponds to raw/QStarPulsar/2007/12/X7120107.wiff. If the raw data file is not present at the expected location then most types of quantitation and viewing the raw data will not be possible for that particular project.
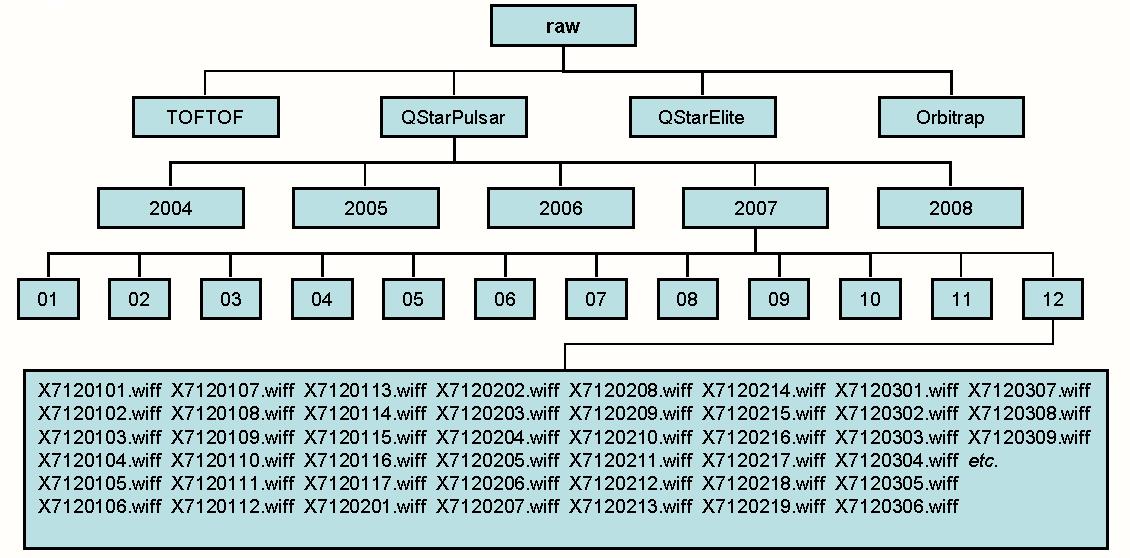
Some example entries in Prospector\web\params\info.txt for centroid_dir and raw_dir are shown below:
centroid_dir D:\Prospector\data\peaklists
raw_dir D:\Prospector\data\raw
Next there needs to be a file in the Prospector\web\params called repository.xml. Details are given here. It is possible to set things up so there are multiple peak lists associated with a single raw file. An example would be when you have both HCD and ETD spectra in the data fraction.
As of Jan 2023 a new version of the Raw Daemon is available. The difference is that the program that executes the jobs (BatchRD.exe) is now written in C# rather than C++. It has some advantages and one disadvantage over the older program.
1. It works on both Windows and LINUX.
2. It is somewhat faster (around 25-35%) for doing quantitation.
3. It is easier to install.
It is only works with Thermo RAW files. The older raw daemon could also handle Sciex WIFF files and ABI TOFTOF data.
The New Raw Daemon service package contains 7 files:
raw_daemon.exe is the daemon binaryraw_daemon.txt is the daemon parameter file
rdd.log is the daemon log file
batchRD.exe is the program invoked by the daemon to run jobs, it takes a job file and outputs a raw data file
ThermoFisher.CommonCore.RawFileReader.dll is a dll required by the package
ThermoFisher.CommonCore.Data.dll is a dll required by the package
ThermoFisher.CommonCore.BackgroundSubtraction.dll is a dll required by the package
batchRD.exe is a compiled c# program. It can be compiled from the source code (you don't need to do this). The latest Microsoft .NET Framework 4.7 no longer includes a C# compiler. A compiler can however be installed as part of standalone MSBuild tool which is available at the following links (note that clicking one of these links automatically starts a download):
2017: https://aka.ms/vs/15/release/vs_buildtools.exe
2019: https://aka.ms/vs/16/release/vs_buildtools.exe
2022: https://aka.ms/vs/17/release/vs_buildtools.exe
Compilation has been tested with the 2017 version. When installing choose ".NET desktop build tools" from the Workloads TAB. 570MB of disk space is required.
When compiling use a command prompt and cd to the directory where the c# source file batchRD.cs and the dll files are located. To do the compilation enter the following commands:
set msbuilddir="C:\Program Files (x86)\Microsoft Visual Studio\2017\BuildTools\MSBuild\15.0\Bin\Roslyn\csc.exe"
%msbuilddir% /reference:ThermoFisher.CommonCore.RawFileReader.dll /reference:ThermoFisher.CommonCore.Data.dll batchRD.cs
The Old Raw Daemon service package contains 5 files:
raw_daemon.exe is the daemon binaryraw_daemon.txt is the daemon parameter file
rdd.log is the daemon log file
batchRD.exe is the program invoked by the daemon to run jobs, it takes a job file and outputs a raw data file
libexpat.dll is a dll required by the package
The parameter section of a typical daemon parameter file is shown below. This is typical if both the Prospector installation and the Raw Daemon are on the same server running Windows.
daemon_loop_time 1
max_searches 1
shared_dir D:\Prospector\repository\temp
user_repository D:\Prospector\repository
raw_dir D:\Prospector\data\raw
multi_process false
daemon_loop_time is the gap in seconds that the daemon waits between checking for new jobs
max_searches is the maximum number of concurrent quantitation jobs, subsequent jobs will be queued
shared_dir is the interchange directory (see below) between the daemon and the Protein Prospector installation
user_repository is the root directory of the Protein Prospector user repository
raw_dir is the root directory of the Protein Prospector data repository if one is present
multi_process should be set to false as this feature hasn't been fully implemented yet
Look for your repository folder which is probably D:\Prospector\repository. This is what is specified by the user_repository directive. It should have been created when you tested the Batch-Tag operation as detailed above.
You will need to create the directory specified by the shared_dir directive. Here we have assumed this is D:\Prospector\repository\temp. Inside the directory specified by shared_dir you also need to create 2 additional directories called rawFetch and searchCompare.
In the above example this would leave us with the directories:
D:\Prospector\repository\temp\rawFetch
and
D:\Prospector\repository\temp\searchCompare
Single spectrum display jobs are written to the rawFetch directory and get dealt with immediately. Quantitation jobs get written to the searchCompare directory and are batch processed.
Edit the file Prospector\web\params\info.txt and specify the parameter upload_temp so it matches the shared_dir directive.
upload_temp D:\Prospector\repository\temp
The Raw Daemon runs as a Windows service. It can be installed from a Command Prompt window run as administrator. Use the cd command to get to the Prospector\web\cgi-bin directory and then enter the following command:
raw_daemon.exe install user password
Here user and password are the user and password that daemon will run under.
Note that if you are logging into a domain-joined machine and there is also a local account with the same name, the domain account will take precedence. To specify the local account you will need to specify the user as the computer name followed by the user (eg. Dell5550\user). The computer name can be found by right-clicking Computer, and then clicking Properties. The computer name appears under Computer name, domain, and workgroup settings. An alternative that works with most recent Windows versions is to use .\user instead. So in these cases example commands would be:
raw_daemon.exe install computer\user password
raw_daemon.exe install .\user password
If you want the daemon to start automatically when the computer is booted then you will need to edit the startup-type for the Raw Daemon service on the Services control panel once the service has been installed.
The daemon service can be uninstalled with the command:
raw_daemon.exe uninstall
IMPORTANT. If you are installing the new version you can skip this section and proceed with the testing section below.
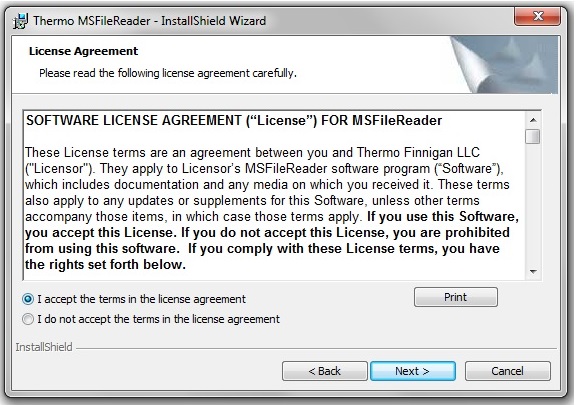
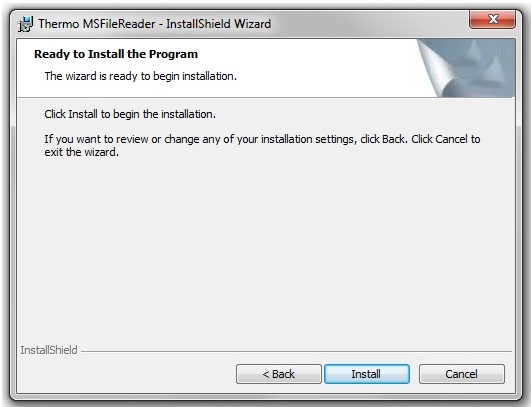
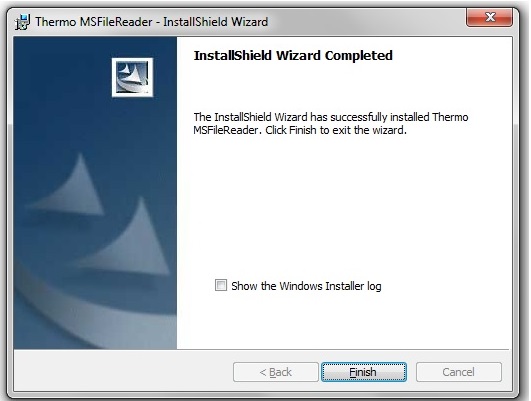
In order to get the Windows version of Protein Prospector to display data from Thermo RAW files you need to install MSFileReader. The version that has been tested is a download available as a zip file named MSFileReader_3.0_SP2.zip.
1). Extract the folder "MSFileReader 3.0 SP2" from the zip file.
2). From the subfolder MSFileReader 3.0 SP2\MSFileReader_x86_Standalone run the MSFileReader.exe installer.
3). Select the default options from the wizard.
The wizard sequence is shown below:


Make sure the Raw Daemon service is running.
Open up the Results Management Page from the Protein Prospector home page. Select the Import option from the menu next to the Submit button.
Select the file T20100722-33_ITMSms2cid.zip using the Browse button.
Press the Submit button.
This will import a project to test the Daemon installation.
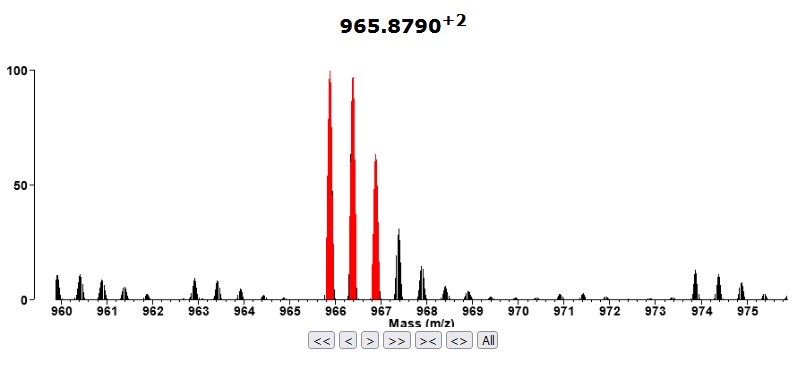
Go to Search Compare and select the newly imported project (T20100722-33_ITMSms2cid). Select a Report Type=Peptide report from the Search Compare form and bring up the report. The m/z column in the report should be coloured blue to signify that the project has raw data (a Thermo raw file). Click on one of the links in the m/z column. It should bring up a display like the one shown below which shows the MS precursor of the MSMS scan.
IMPORTANT. If you are installing the new version you can skip this section.
This section is only relevant if you want to view the raw data from Sciex wiff files. The Raw Daemon still supports this.
In order to get the Windows version of Protein Prospector to display data from Sciex wiff files you need to install Analyst. We have tested this on AnalystQS v2.0. On the Analyst CD there is an Install directory. For Windows XP you just need to run the setup.exe file. You will need to reboot the computer at the end of the install. On reboot there should be a service running called AnalystService in the Task Manager. For Windows 7/Windows 10 right click the setup.exe file and bring up the Properties window. On the Compatibility Tab there is a section called Compatibility Mode. Check the checkbox labelled Run this program in compatibility mode for: and set the menu beneath it to Windows XP (Service Pack 3). Click the Apply button. Then run the setup.exe program and when it has finished reboot the computer. Although the Windows Analyst program itself doesn't appear to work with Windows 7/Windows 10 the installation does allow Protein Prospector to display spectra contained within wiff files.
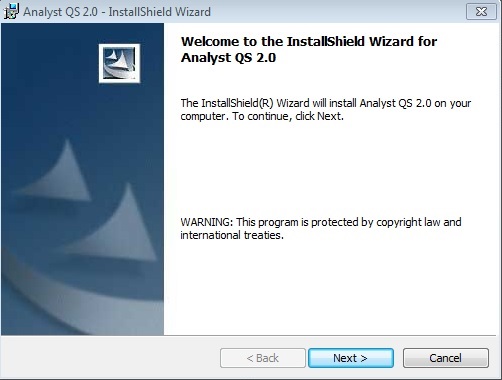
The wizard first displays a welcome page followed by a license agreement. The third page requires you to specify a user to run the service. The user must have the rights to run service programs.
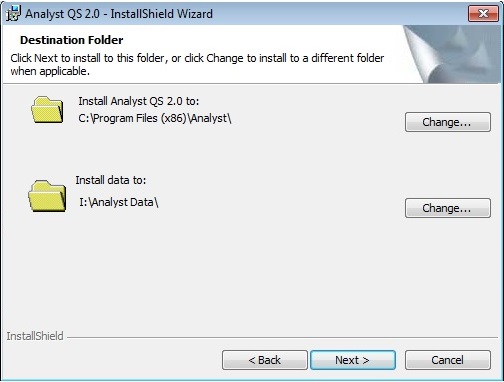
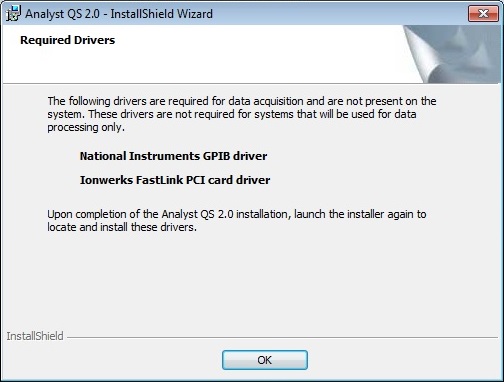
The fourth page requires you to specify install directories. The Install data to: option needs to refer to an existing disk location where it will create a directory called Analyst Data. The Required Drivers on page 6 are not required by Protein Prospector.

Reboot the computer at the end of the installation.
1. Press Windows + S and type "Settings", then press Enter.
2. In Settings, click on System.
3. Scroll down and select About.
4. Under Related Links, click Advanced system settings. This opens the System Properties window.
5. In the Advanced tab, click on Settings under Performance.
6. In the Performance Options window, go to the Advanced tab and click Change under Virtual memory.
7. Uncheck Automatically manage paging file size for all drives.
8. Select your system drive (usually C:).
9. Choose Custom size.
10. Enter Initial size (MB) and Maximum size (MB) as 65536 (which is 64 GB in MB).
11. Click Set, then OK on all windows.
12. Restart your computer to apply the changes